
Swing
The Swing page is built from your range shots. Most cards look at your recent full swings and leave out mishits. If any of those are new to you, read How your numbers are worked out first: it makes the rest of this page make sense.
Your bands
Section titled “Your bands”

Four cards that say where your driver and 7-iron sit, from your recent shots (newest counting most):
- Driver speed: your swing speed, worked out from your ball speed, as a band from slow to fast, and how far you are from the next band up.
- Driver flight: whether your launch, spin and landing angle are in the window that carries furthest for your speed. A faster swinger needs a lower launch and less spin than a slower one, so the window moves with you.
- 7-iron speed: your 7-iron swing speed band.
- 7-iron stopping power: how steeply your 7-iron comes down. A steep landing stops on the green; a shallow one runs off the back. The target depends on your speed: slower swingers need a higher, softer flight to hold a green.
The little line on each card is how that number has moved over your sessions this year, with the change beside it. The line is part of Pro; the cards themselves are on every plan.
You vs the tours
Section titled “You vs the tours”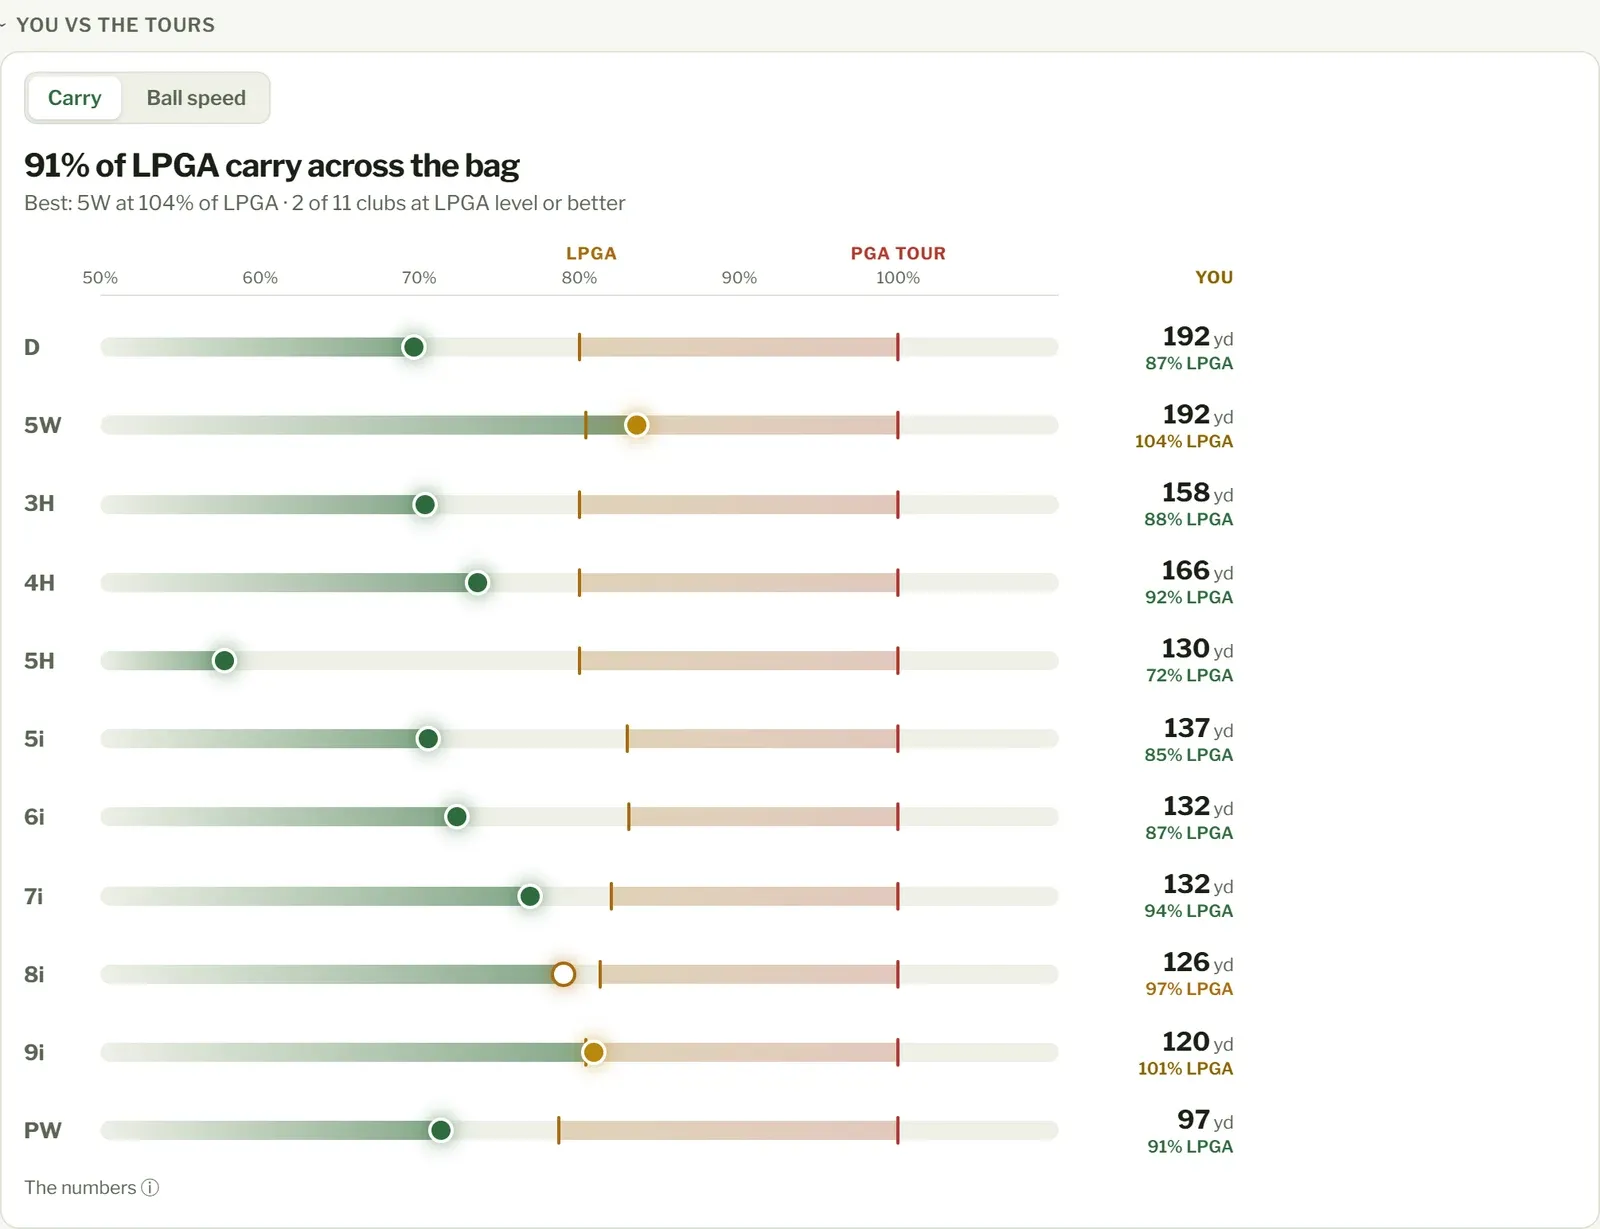
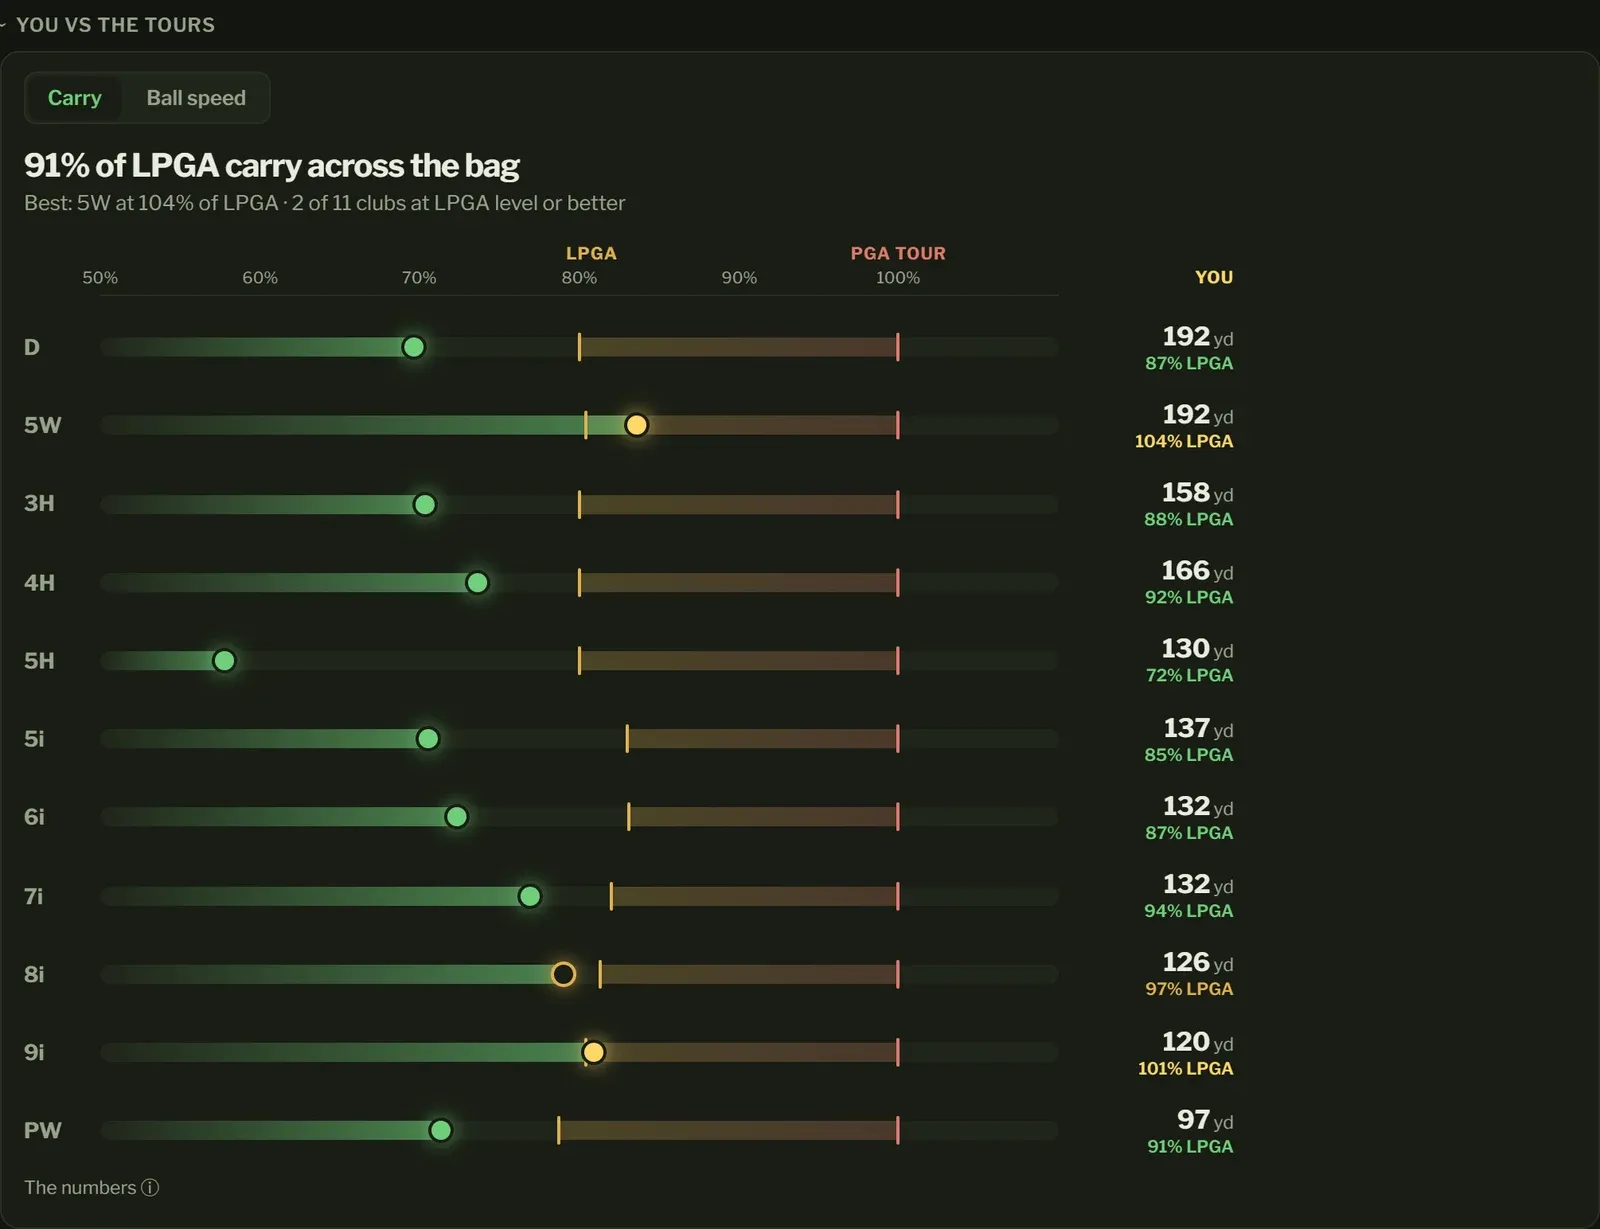
Each club’s typical full-swing carry next to the PGA and LPGA Tour averages. The headline says how far you carry across your bag as a share of the LPGA Tour’s distances, and which clubs are at LPGA level or better.
- Each row’s dot is you. It’s gold when you’re at or beyond the LPGA average.
- The shaded span runs from the LPGA mark to the PGA Tour mark.
Switch between Carry and Ball speed. The numbers opens it all as a table. A club needs a few full swings to appear.
Gapping
Section titled “Gapping”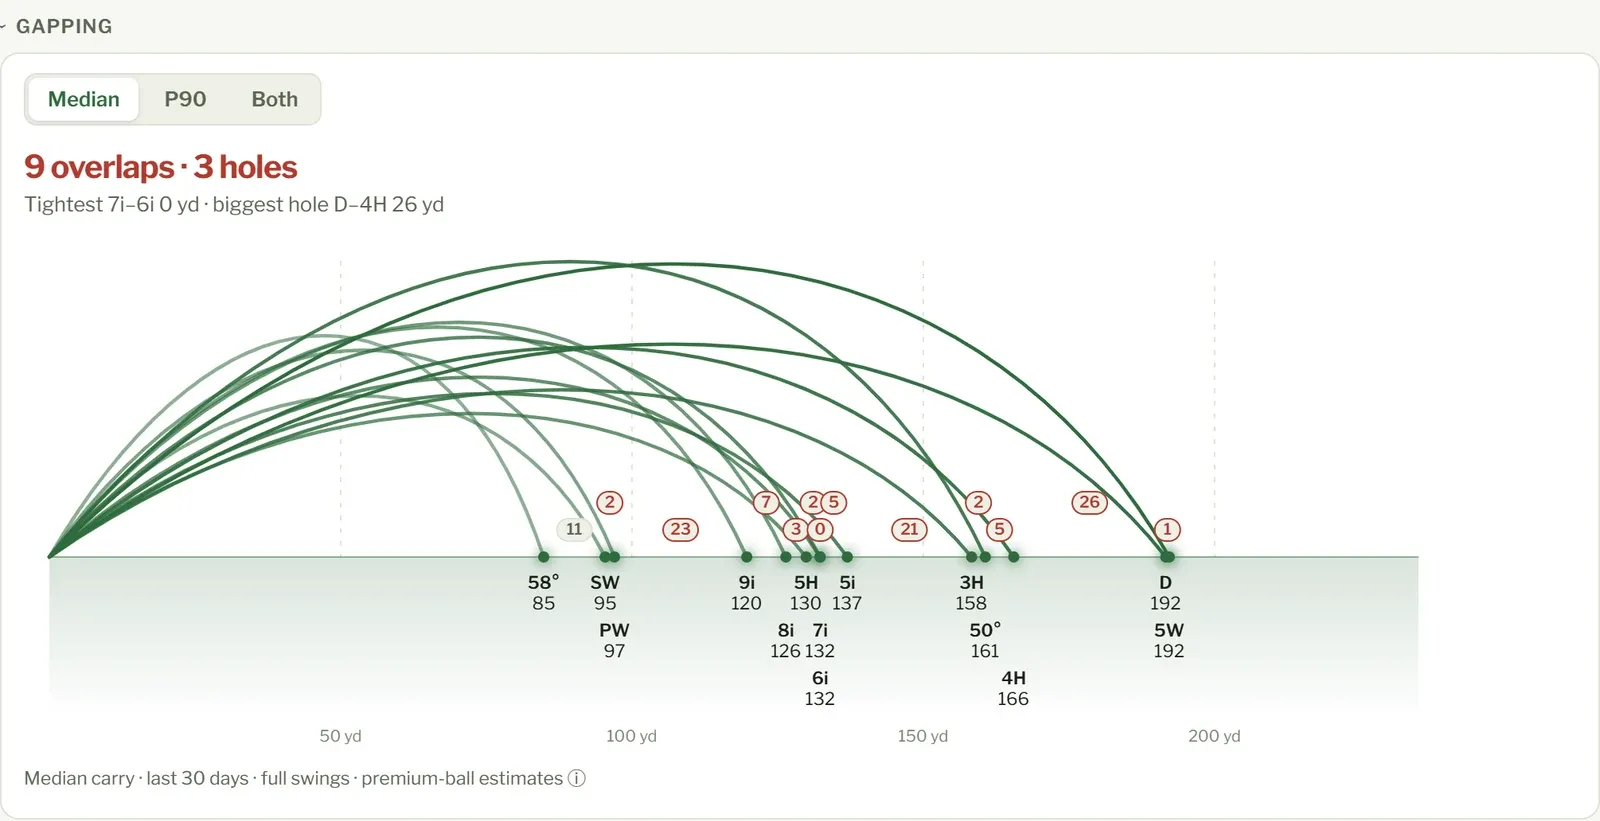
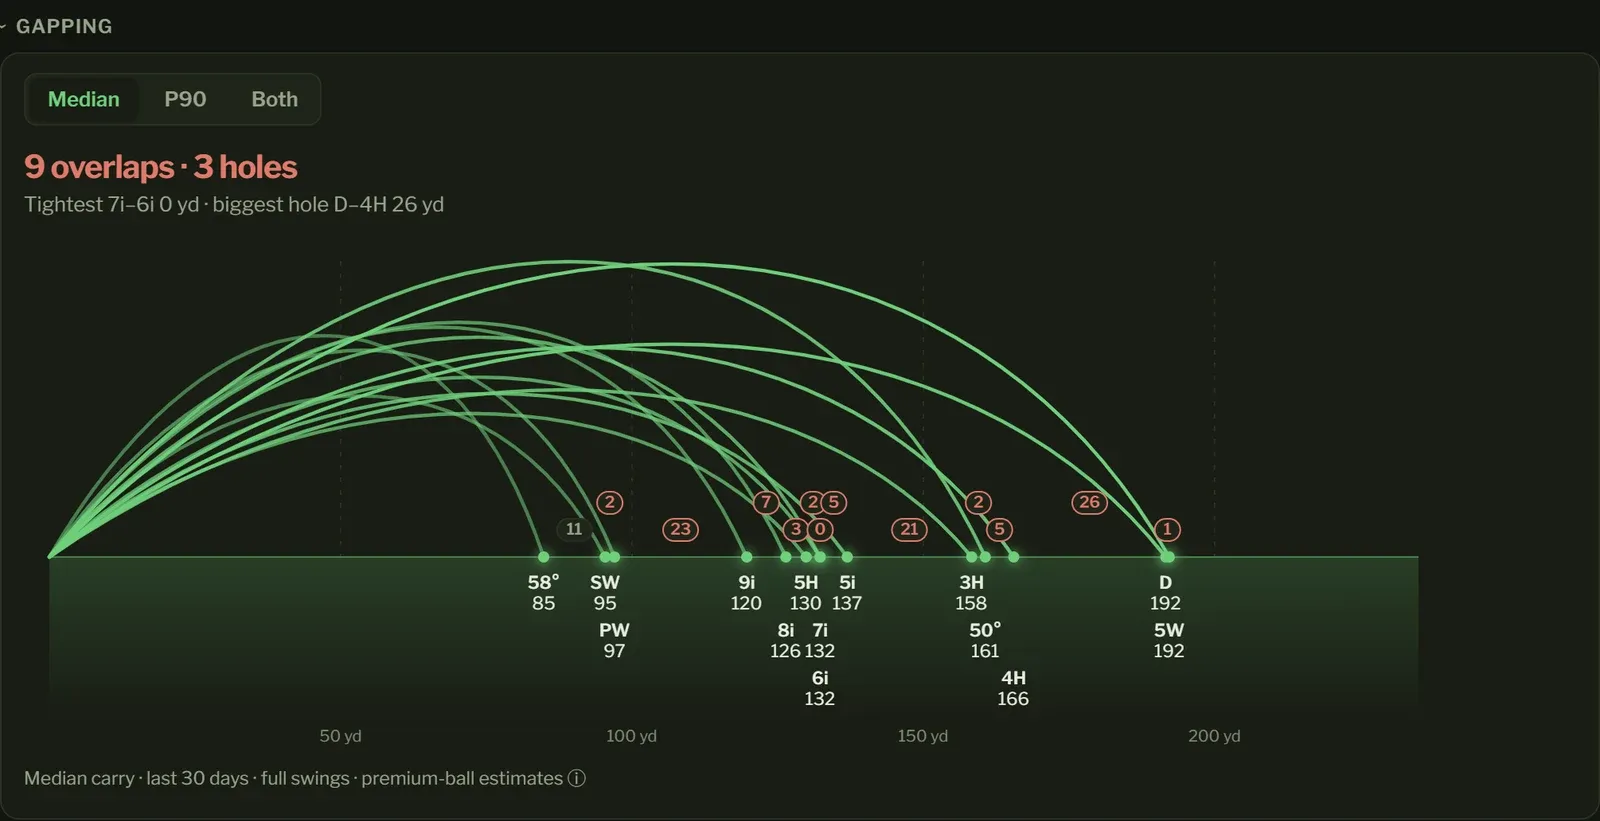
Each club’s flight drawn as an arc, from the ground to its peak height and down to where it lands, so you can see the gaps between one club and the next.
Ideally each club goes a steady step further than the one below it. Two clubs too close together are doing the same job (you could drop one for a club that fills a hole); two too far apart leave a distance you can’t hit with a full swing. Either is marked in red.
Median shows your typical shot with each club, P90 your good day, and Both shows the two, with your good day dashed. See your typical shot and your good day.
If your watch tracks your shots during a round, gapping can come from those too, in total distance on the course, roll and all: the same numbers as your yardage card’s course card. With range sessions as well, choose Course or Range above it; the two are never mixed. Without range sessions, gapping is all Swing shows: launch, spin and shot shape need a launch monitor.
Shot shape
Section titled “Shot shape”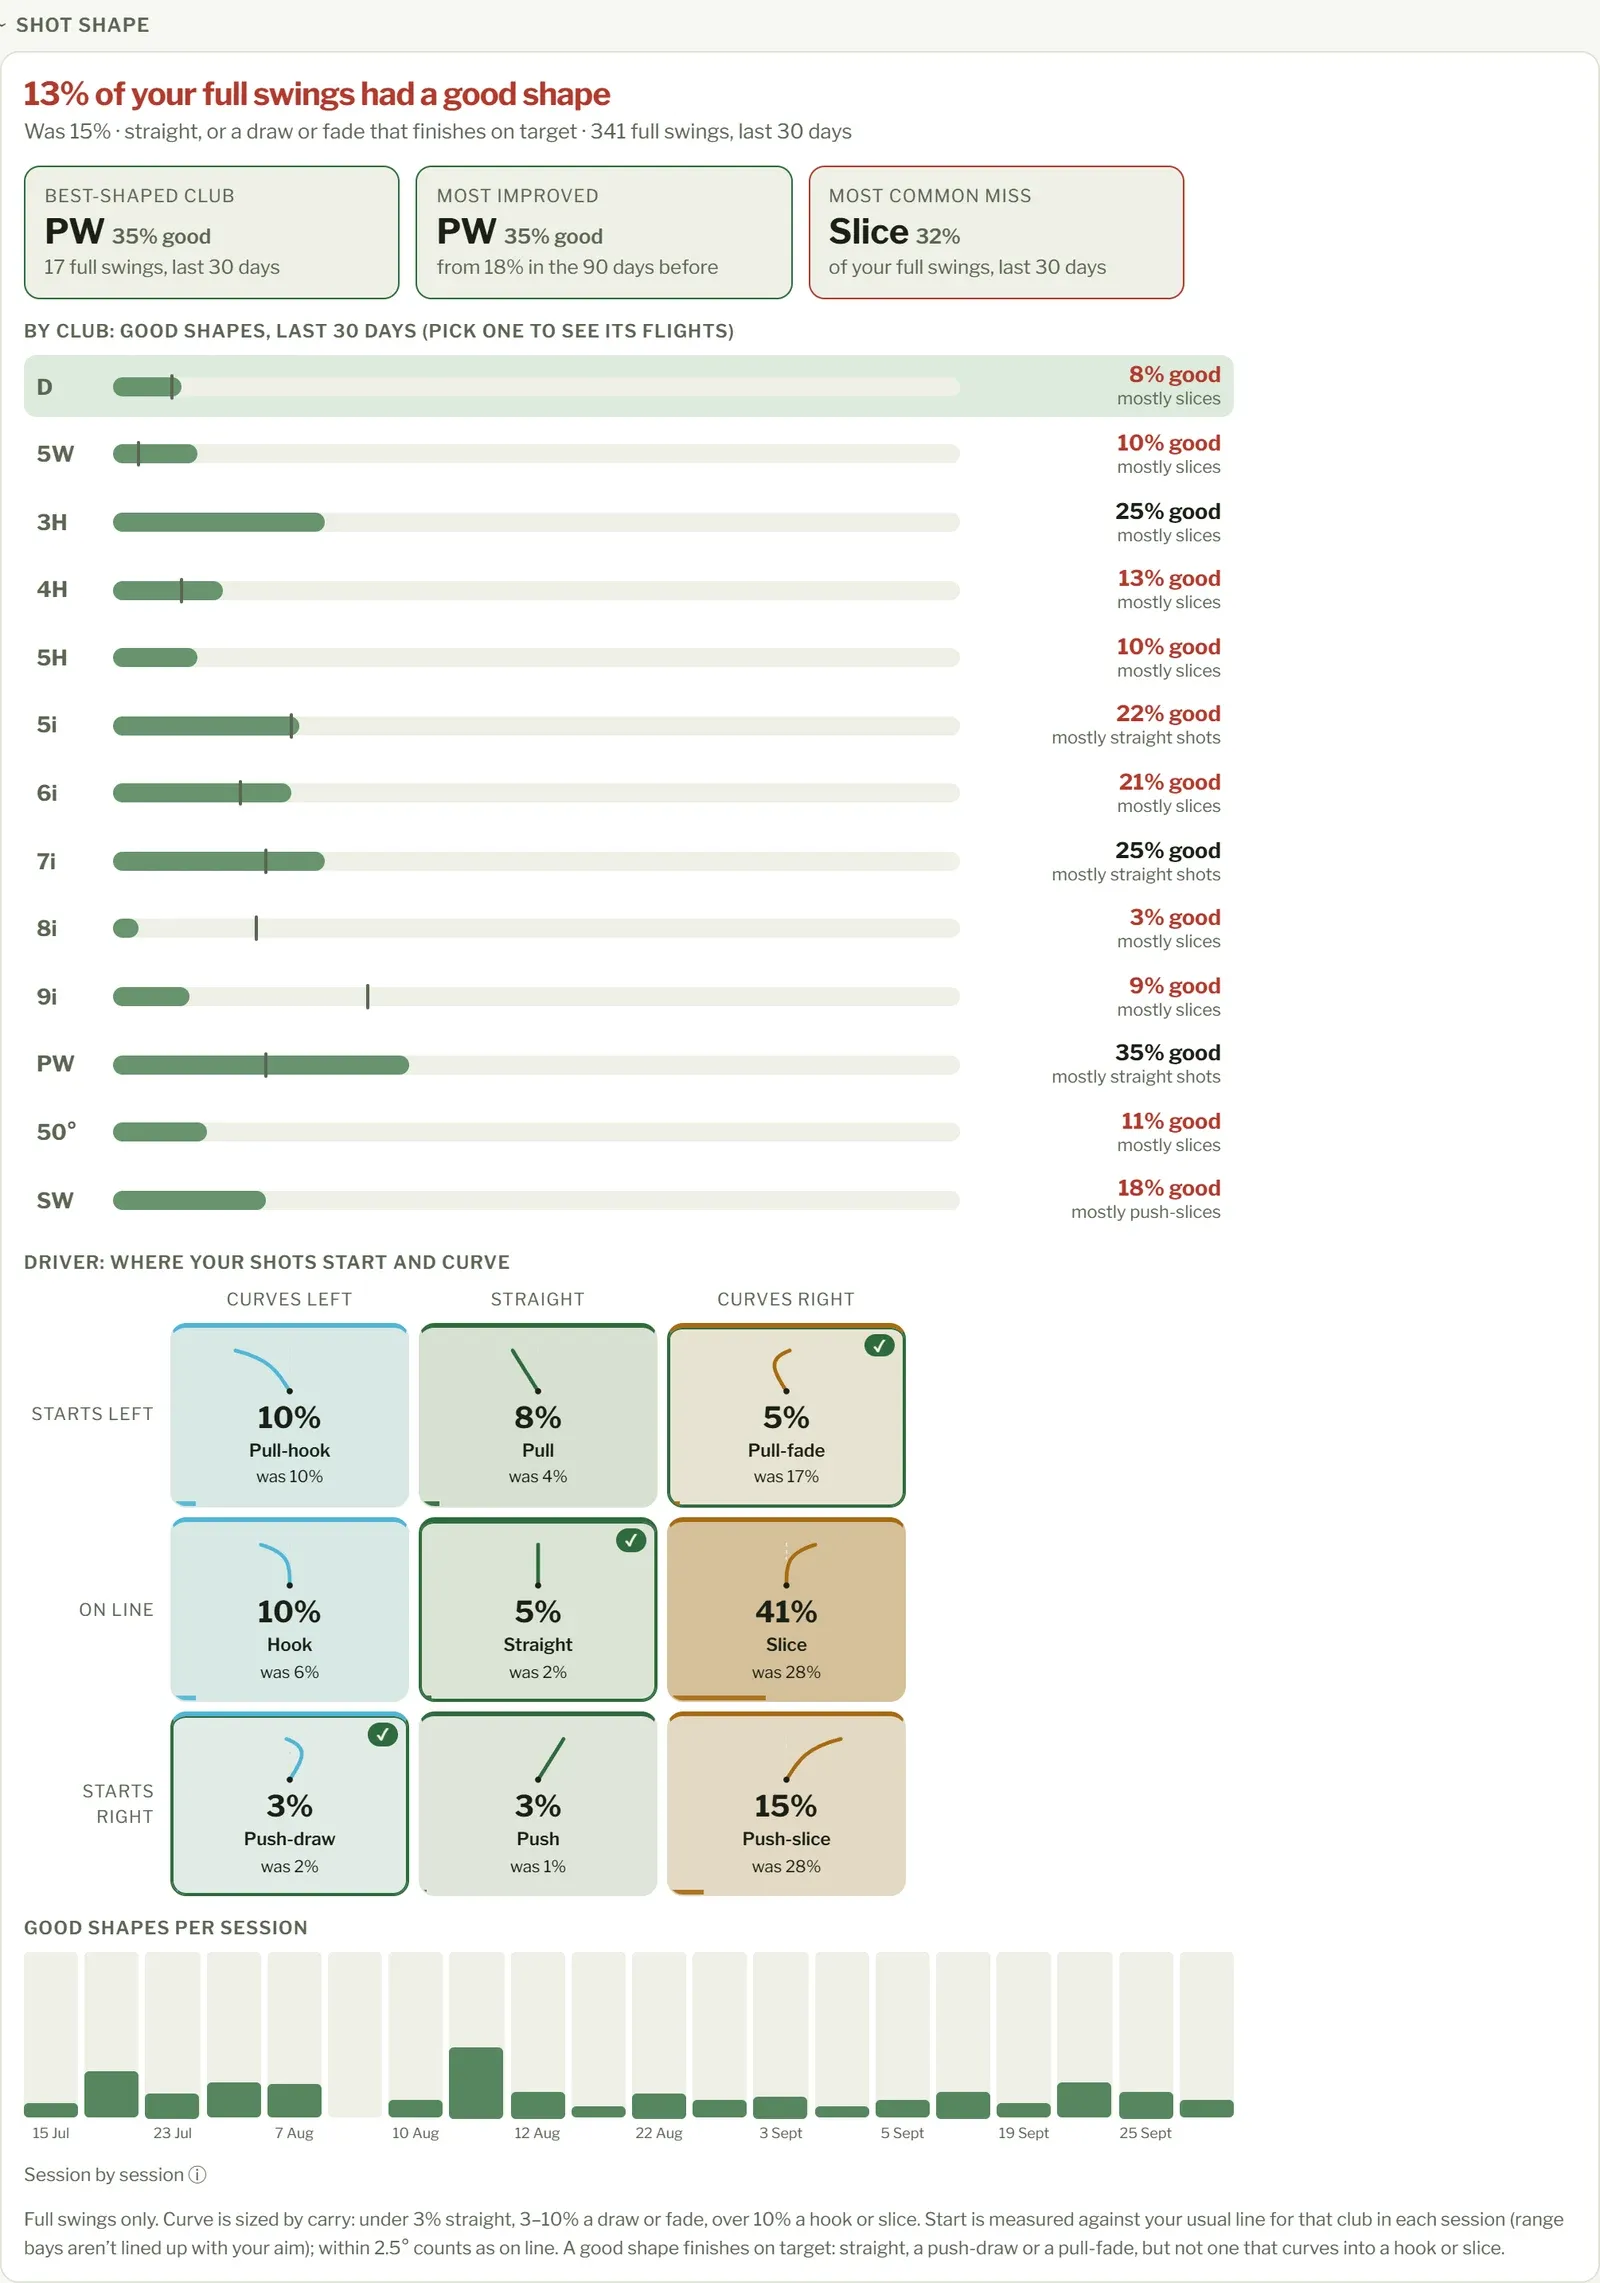
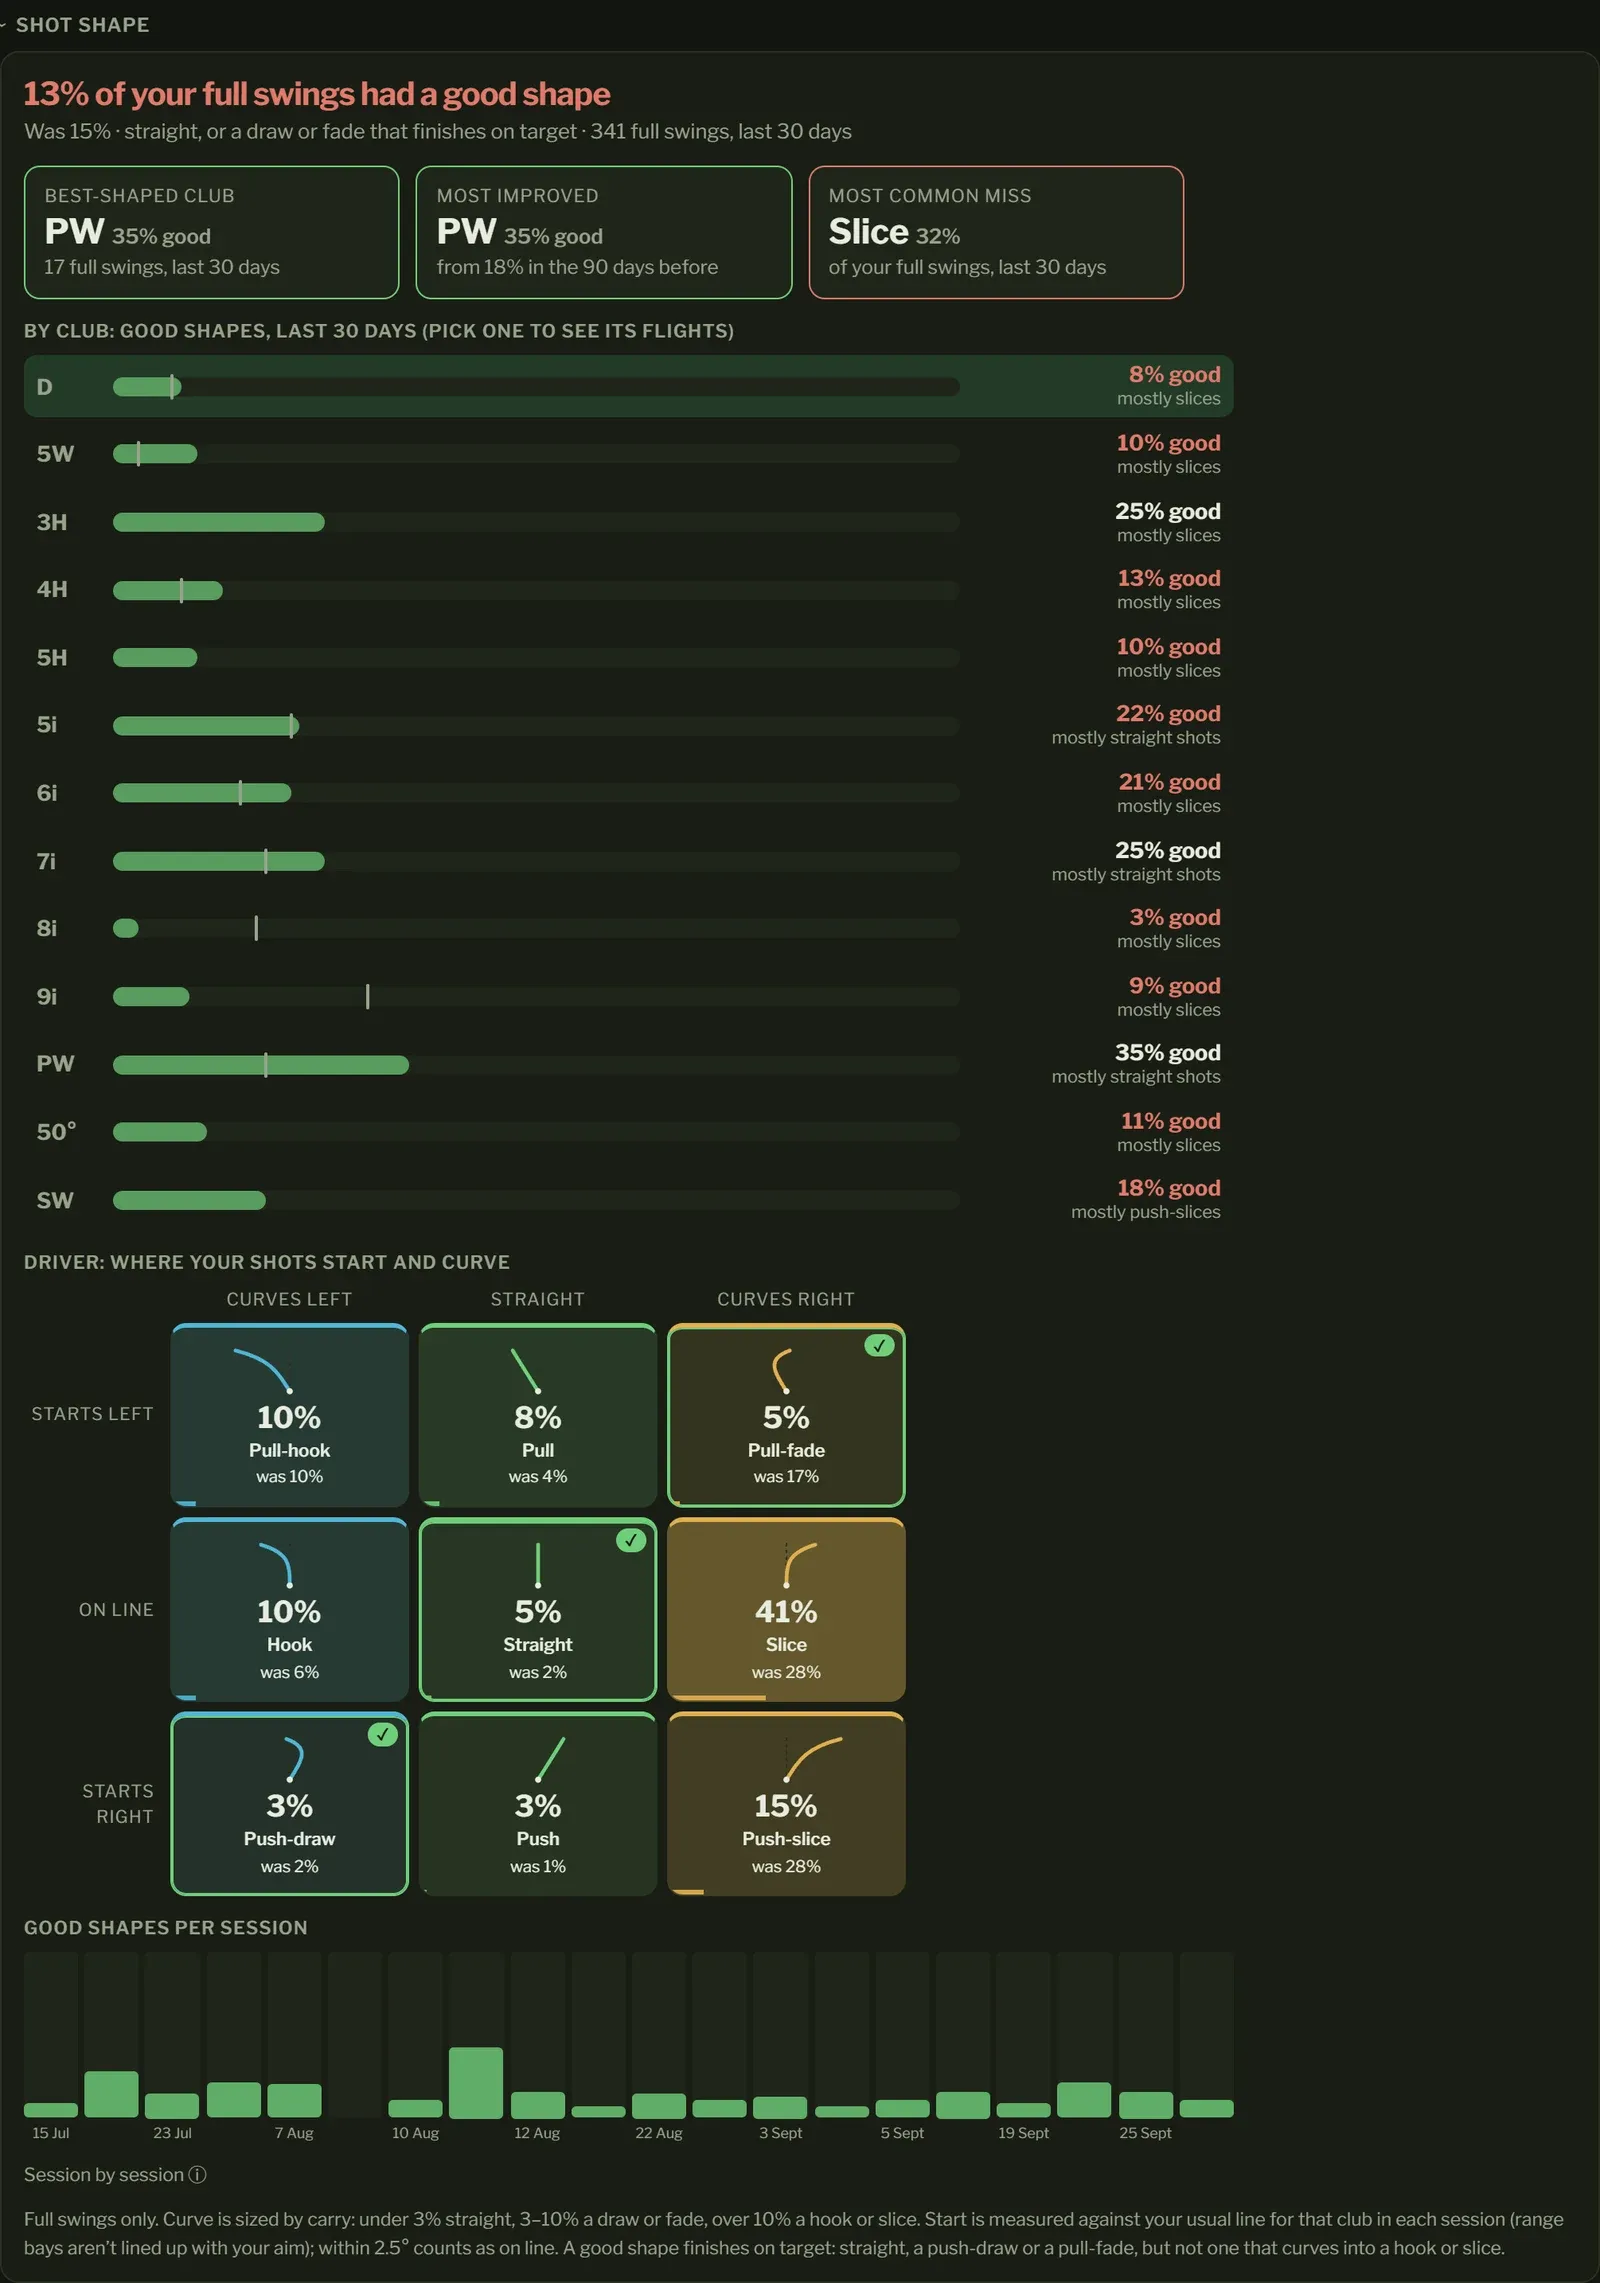
How often your full swings had a good shape: one that finishes on target. There are three:
- Straight: starts on your line and doesn’t curve much.
- Push-draw: starts right of your line and curves back left.
- Pull-fade: starts left and curves back right.
(For left-handers, left and right swap.) A shot that curves too much becomes a hook or a slice, and isn’t a good shape even if it started the right way.
Because a range bay isn’t always pointing where you aim, your “line” is where that club usually starts in that session, not straight down the bay. A small curve counts as straight, and a big one is a hook or a slice, sized to the length of the shot.
The card picks out your best-shaped club, your most improved (its latest 30 days against the 90 before) and your most common miss. Below, each club’s shapes over its latest 30 days, so a club you haven’t hit lately still shows; pick one to see its flights: where they start and how they curve. Good shapes per session shows how it’s moved over your last 20 sessions.
Shot shape is part of Pro.
How ball flight works
Section titled “How ball flight works”A short explainer, seen from above, of why the ball starts and curves the way it does: where the clubface points at impact sets most of the start direction, and the face compared with the path your club is swinging on sets the curve. Each of the nine shapes shows its club face and club path; tap one to play its flight again, and the ones that finish on target are ticked. It’s there to help you read your shot shapes, not to tell you how to swing.
Dispersion
Section titled “Dispersion”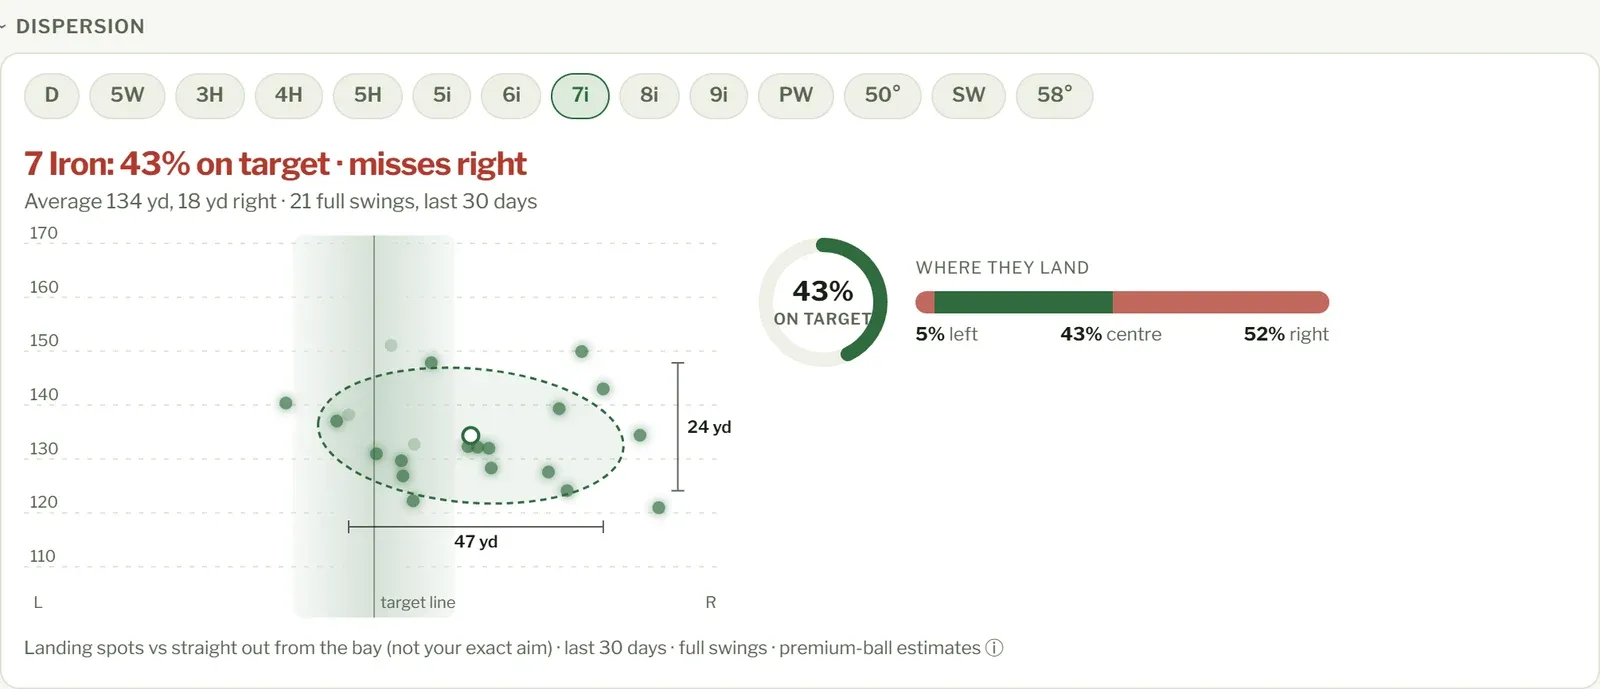
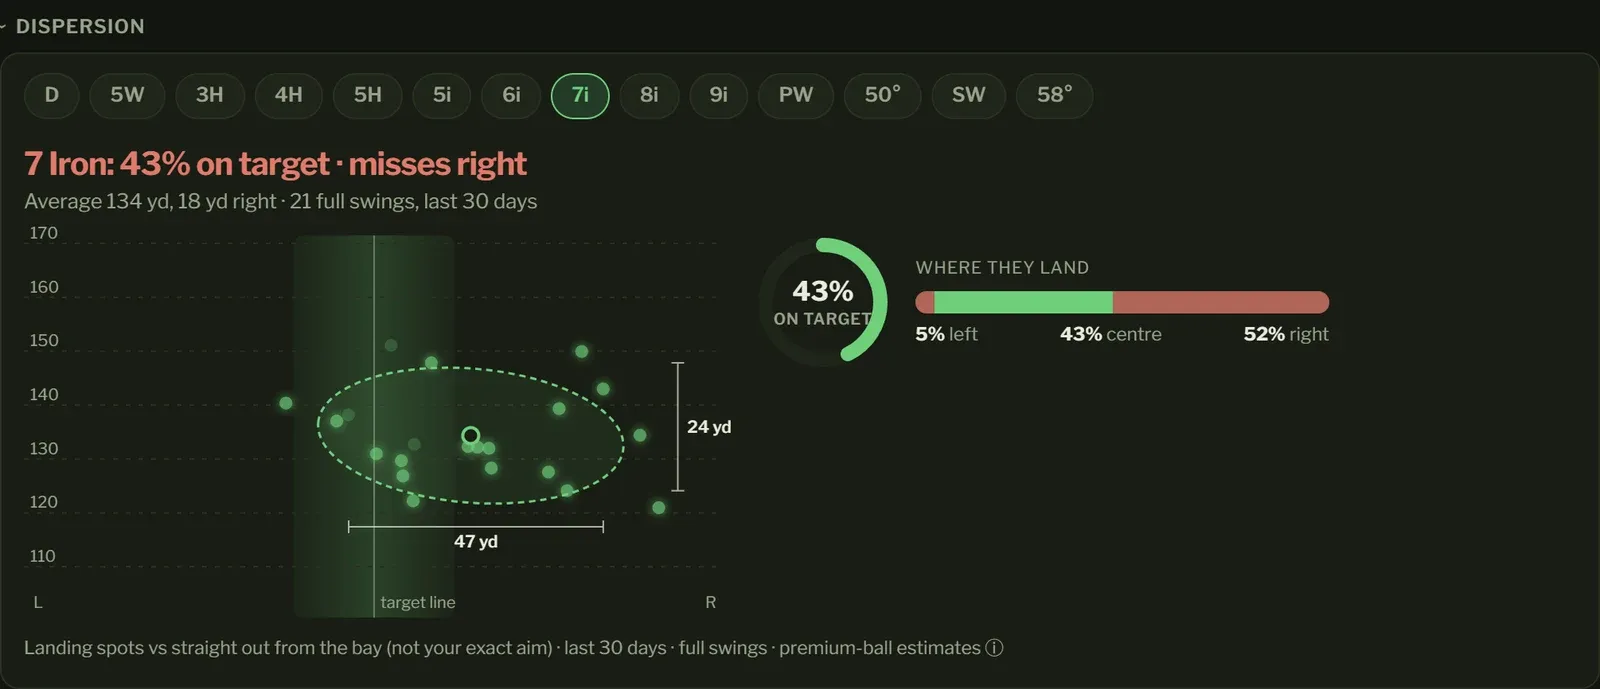
Pick a club to see where your full swings landed, as if you were looking down on the range.
- The target line runs straight out from the bay. Your launch monitor can’t know exactly where you were aiming, so if you aim at a flag off to one side, your shots will look like they miss that way.
- On target is the shaded strip either side of the line, about the width of a fairway. Where they land splits your shots into left, centre and right.
- The dashed oval holds about two thirds of your shots, and the numbers beside it say how wide and how deep it is. A small oval means you’re consistent; a big one, scattered.
- The hollow ring is where your shots land on average. If it sits off to one side, you have a pattern you can allow for.
- Shots from the last two weeks are bright; older ones are faded, so you can see whether you’re tightening up.
The headline sums it up: finding the fairway, missing mostly right or left, or spraying both ways.
Trends by club
Section titled “Trends by club”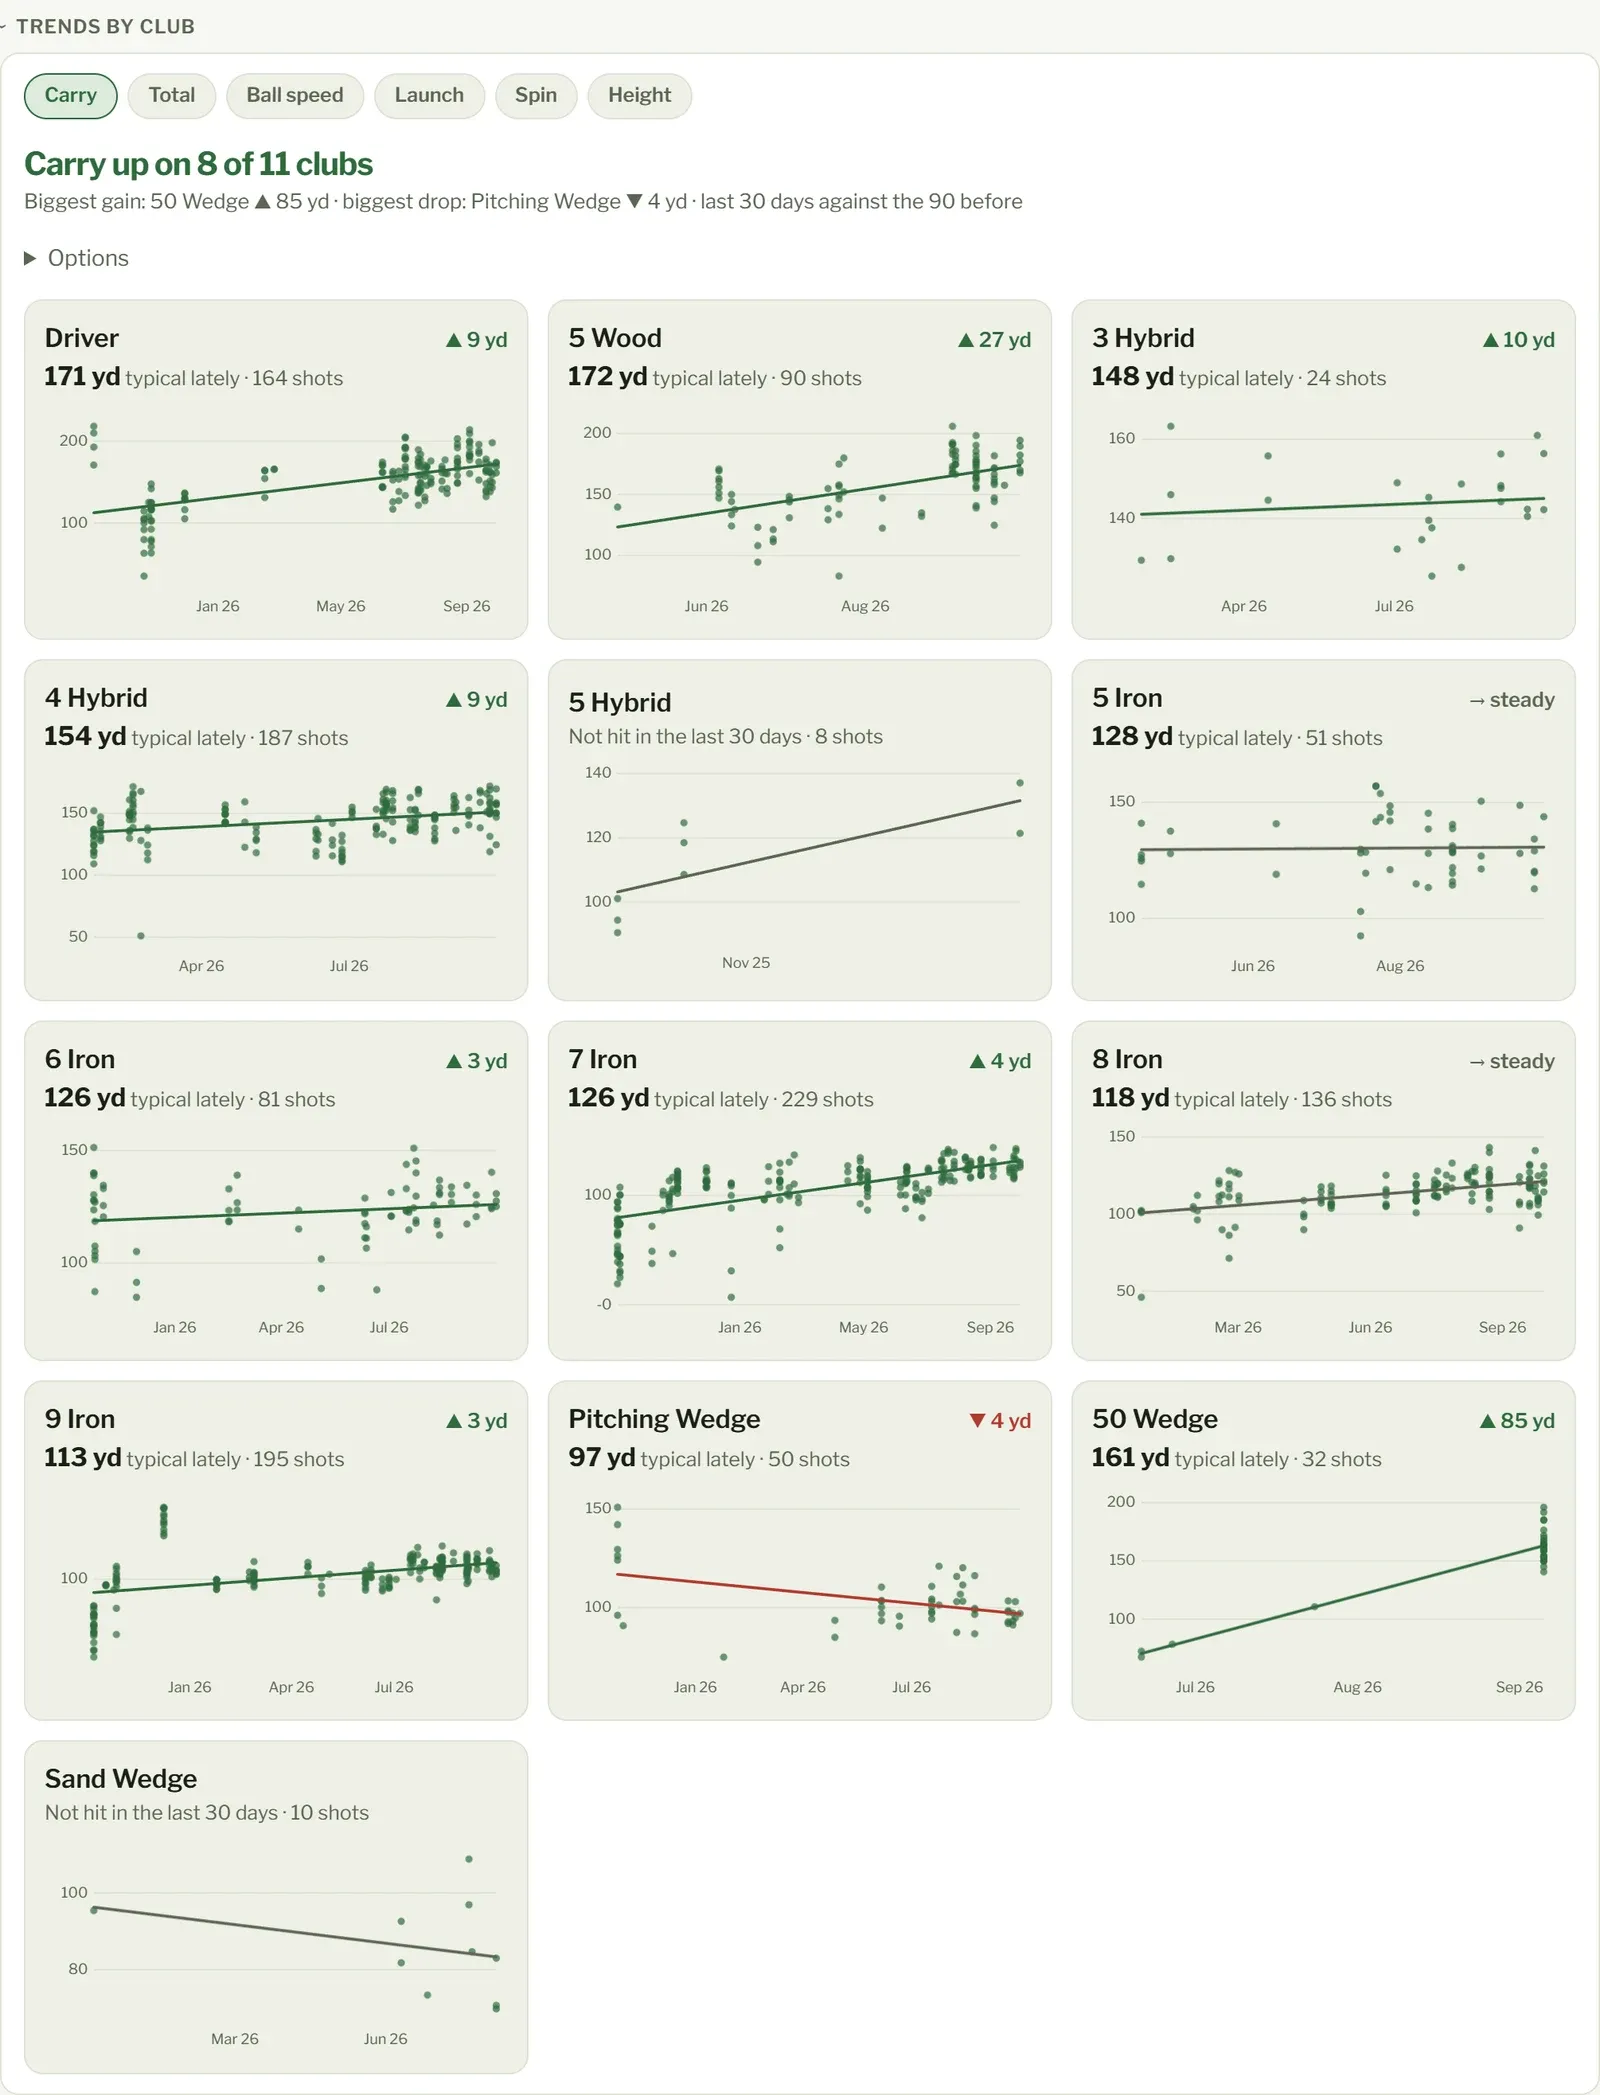
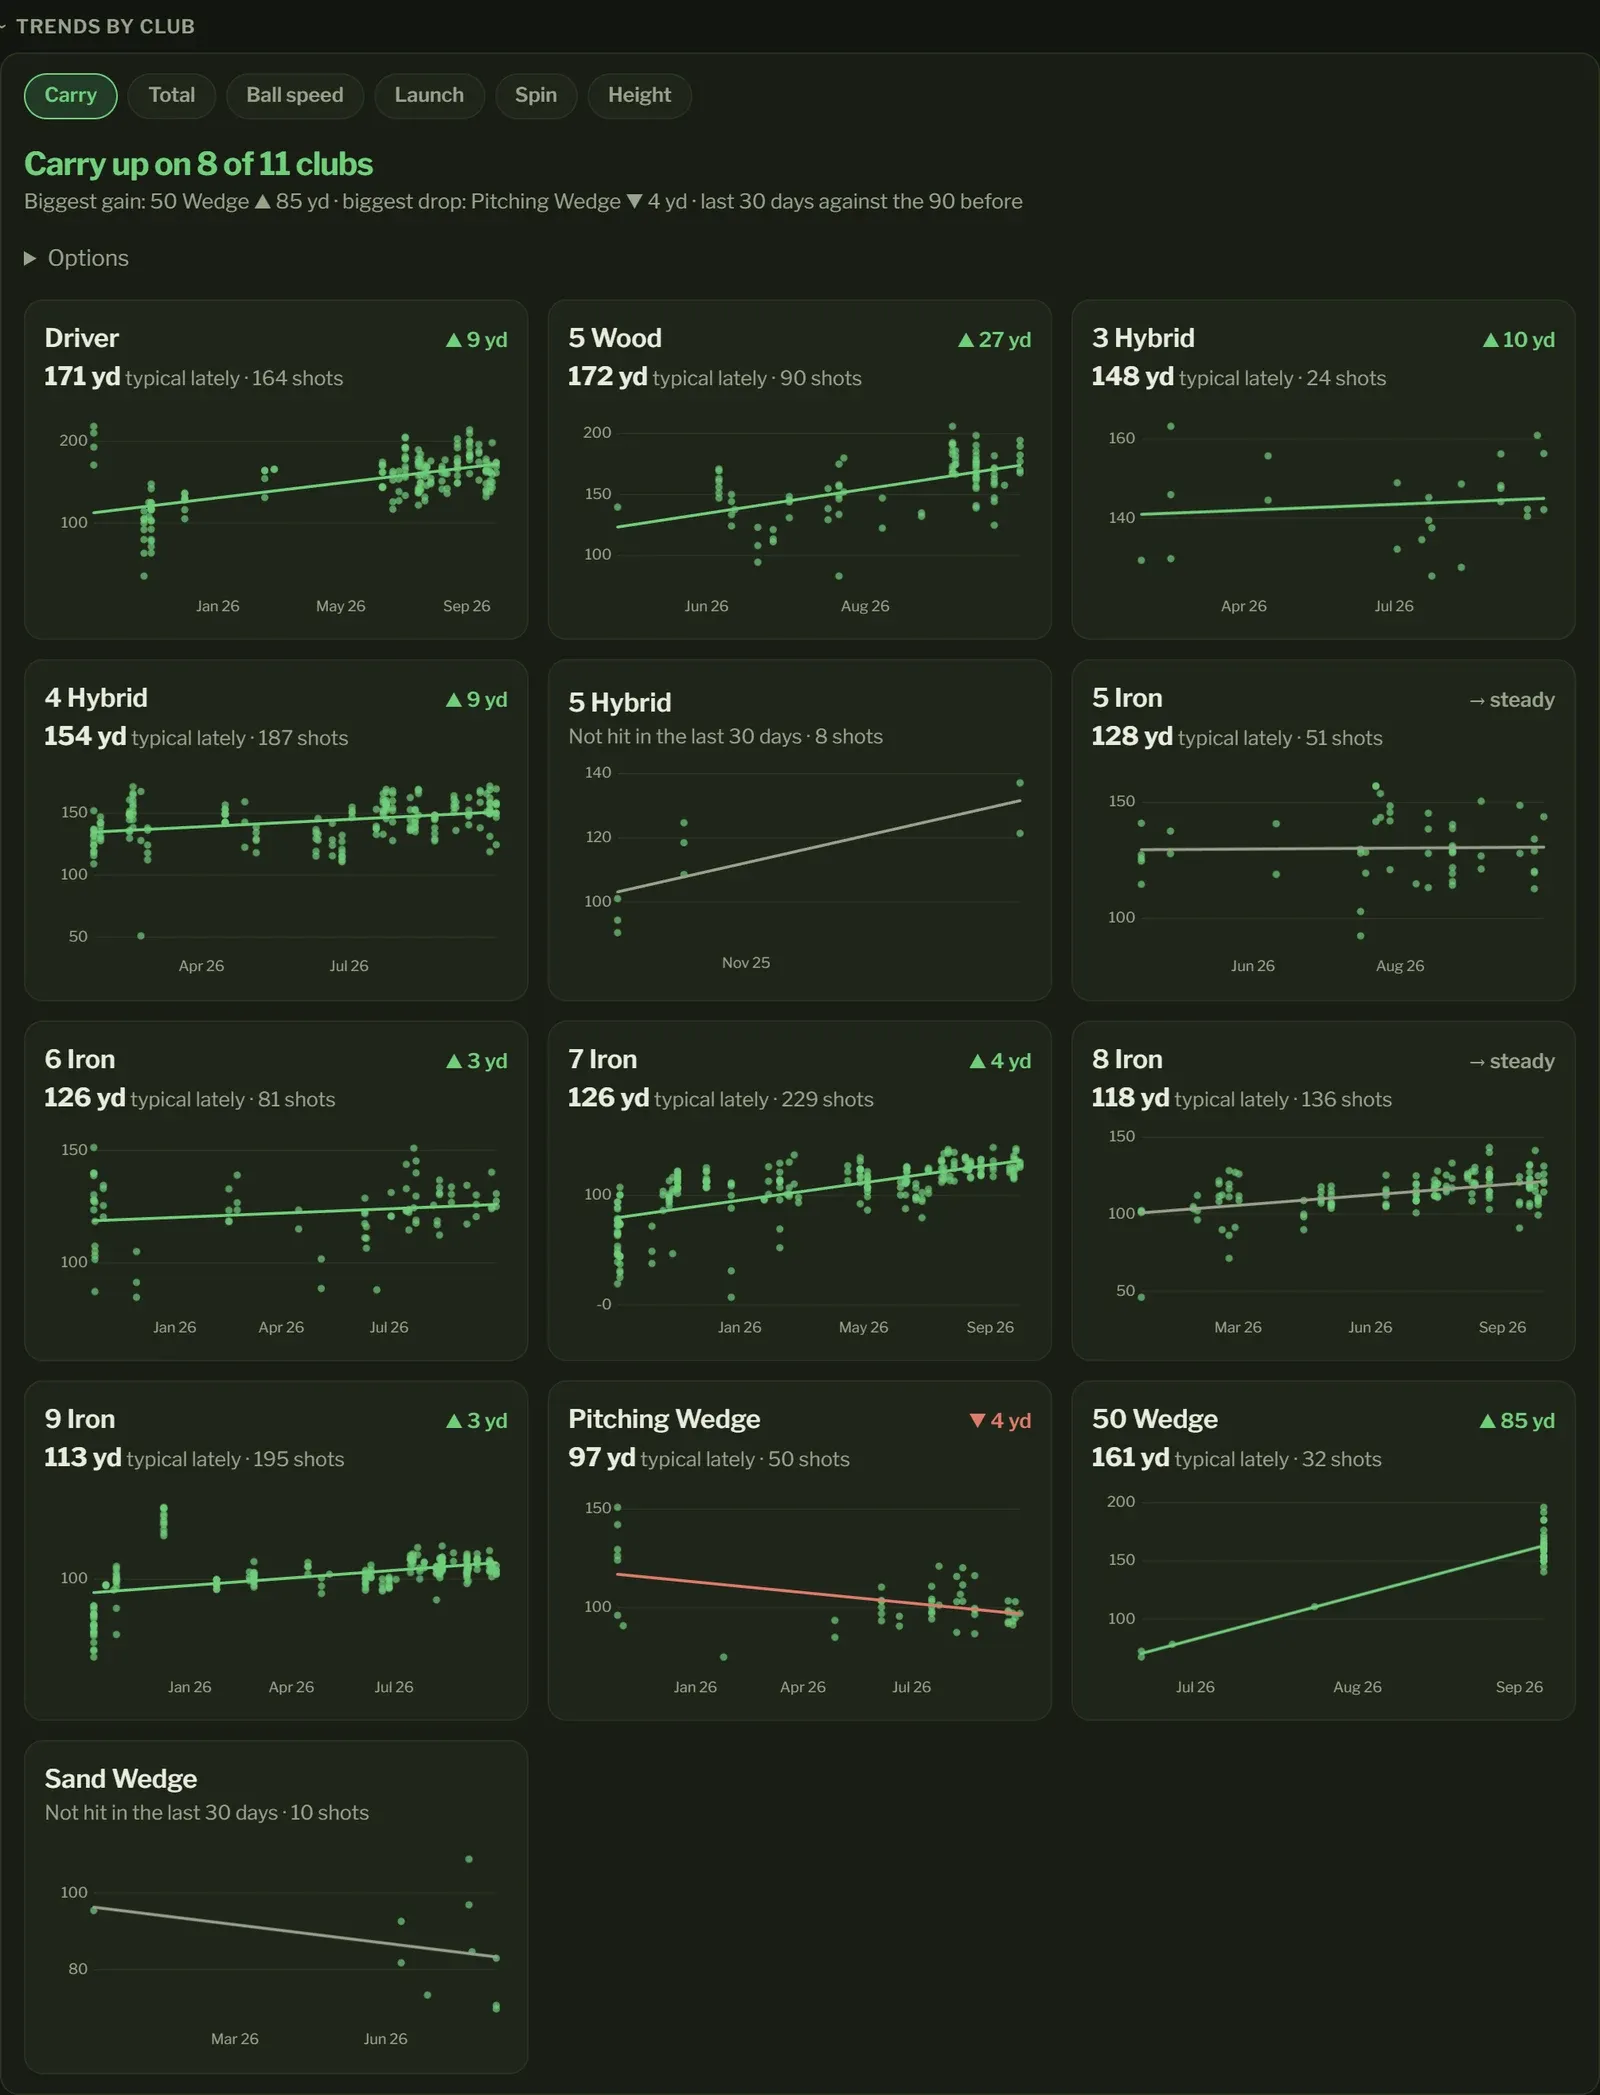
Whether each club is going further, faster or higher. Pick what to look at along the top: Carry, Total (carry plus roll), Ball speed, Launch angle, Spin or Height. If your launch monitor measures the club, you can also pick Club speed, Smash (ball speed divided by club speed), Attack angle, Path or Face.
The headline counts the clubs going up, with your biggest gain and drop. On each club’s card, good shot lately is a good shot of yours over the last 30 days: a quarter of your shots beat it. Practice mixes in drills and new feels, so this follows what you can do rather than every experiment. The arrow in the corner is how much that’s changed from the 90 days before (steady if it’s barely moved). Launch, spin, height and the club’s angles are about hitting a window, not more, so for those the card shows your typical shot instead.
Each dot is a shot. The line follows that number as it went, over the month before each day you hit the club (or your last 20 shots, if you hit it less). The shading runs from your typical shot to your best few, or for launch, spin, height and the angles, covers the middle half of your shots. A club you haven’t hit in the last 30 days says so instead.
On Free, you see every measurement for the club you’ve hit most; your other clubs are listed without their numbers. Pro shows your whole bag.
Options chooses which shots are counted:
- Leave out mishits (on to start with): leaves out shots your launch monitor flagged as unreliable.
- Full swings only (on to start with): leaves out part swings, so a session of half wedges doesn’t look like you’ve lost distance.
Paragraph remembers your choices. A club needs a handful of shots to show.